The Synchronized Google Maps User Interface
In January 2018, the Synchronized Google Maps software and user interface was updated.
This page will discuss how to use Synchronized Google Maps. After displaying snapshots of the user controls and a sample with 4 synchronized maps, we will step through how to use the controls and how to interact with the maps. At the bottom of this page, there is a link to more information and examples related to Synchronized Google Maps.
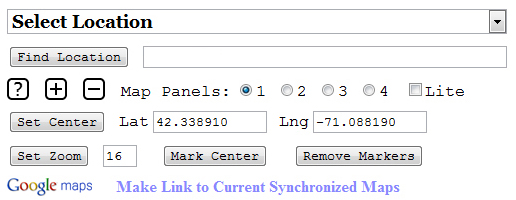
Here is a snapshot of the complete user controls at the top of the Synchronized Google Maps user interface.

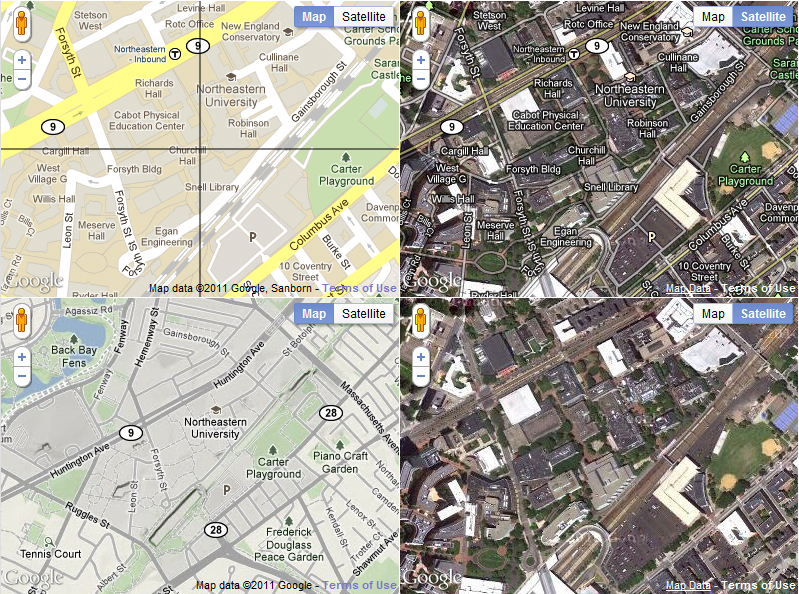
Here is a snapshot of 4 synchronized maps. What you see below is the default arrangement of maps shown when the user clicks on the Map Panels radio button 4.
The maps are synchronized in the sense that the map centers are identical. This relationship is maintained even if the user drags one of the maps with the mouse. This is quite convenient when comparing road maps, satellite maps, and terrain maps.

The default arrangement of the four maps is summarized in the table:
| Road Map | Hybrid Satellite Map |
| Terrain Map | Satellite Map |
This default arrangement was chosen because the road map and the hybrid satellite map (with labels) appear to be the most useful. These are the maps that will be seen if 2 map panels are selected. Furthermore, if 4 map panels are selected, then the satellite map will be directly underneath the hybrid satellite map which makes comparison easy.
It is possible to change this default arrangement by use of the Google controls embedded in each map or by query parameters.
We will now discuss the Synchronized Google Maps user interface in detail. For convenience, we display the complete user controls once again.

The Select Location dropdown menu is populated by a list of location names that is maintained in a separate text data file. This text data file contains a collection of lines of the form:
LocationName|Latitude|Longitude|ZoomLevel
The location name, latitude, and longitude are required in order to position the center of the map at a specific position. The zoom level is optional and should be between 0 and 20 if supplied. If the zoom is not supplied then the map will retain the zoom level from the last previous location.
The default text file name is mapspots.txt. At Northeastern
University, this file contains the names and locations of buildings
and other points of interest. A developer using this code may make
their own default file.
You may view the default location file by clicking on the link:
mapspots.txt
A text data file with lines of the form:
LocationName|Latitude|Longitude|ZoomLevel
may also be created for many purposes and linked to this application by supplying its path in a query parameter of the form:
data=pathMore details on this may be found at:
Synchronized Google Maps Data File Format
Synchronized Google Maps Query Parameters
The Select Location dropdown menu may be eliminated in two ways:
Specify no data file by using the query parameter:
data=none
Specify a data file that has no location information but rather uses its initial line to simply reset the default settings for the Synchronized Google Maps application.
The Find Location button will search for a geographic location based on information typed by the user into the large text box that is just to the right of the button. The search for the location will be done by the Google search server.
Once the search location information has been typed in, you may initiate the search simply by pressing the return key. It is not necessary to mouse over and click the Find Location button.
If a geographic location is found by the Google search server, then the first such location will become the center of the map and a marker will be placed at that position.

If no geographic location is found, then the user will be notified in an alert box.
Note that the search location information entered by a user may only contain the following characters: letters, numbers, blanks, commas, periods, hyphens, and parentheses.
The
![]() button opens up this explanation of the
Synchronized Google Maps user interface
in a new tab.
button opens up this explanation of the
Synchronized Google Maps user interface
in a new tab.
The
![]() button causes the maps to zoom in by one level.
button causes the maps to zoom in by one level.
The
![]() button causes the maps to zoom out by one level.
button causes the maps to zoom out by one level.
The minimum zoom level is 0 but that is so far removed from the map details as to not be very useful.
The maximum zoom level is 20 for road maps and for variants of satellite maps.
The maximum zoom level for terrain maps with fine contour lines is 15. As of 2018, we have decided to let terrain maps zoom to level 20. If the zoom level is higher than 15, Google will show either a blurry terrain map or temporarily revert to a roadmap.
The Map Panels control provides four radio buttons numbered 1, 2, 3, 4 to select the number of synchronized maps that will be displayed at once. By default, one map is initially displayed. This default may be changed via a query parameter.
The Lite check box determines how many of the user controls will be displayed. As of 2018, the default is that the Lite check box is checked when the application opens.
If the Lite check box is checked, then only the first 3 rows of the user controls will be displayed:

This simpler interface is called lite mode. We decided to make lite mode the default because this mode is most convenient for end users.
If the Lite check box is unchecked, then all user controls
will be displayed.
Note that by using the query parameter lite=false one can
force Synchronized Google Maps to uncheck the Lite check
box and open with all controls displayed.
The Set Center button will set the map center using the latitude and longitude values supplied by the user in the Lat and Lng text boxes.
Conversely, if the user drags any one of the synchronized maps, the centers of all maps will be changed to the new center. This is why we call the maps synchronized. Furthermore, as a map is dragged by the user, the latitude and longitude values of the map center will be updated in real time in the Lat and Lng text boxes. The curious user may find this latitude-longitude information interesting.
The real time latitude-longitude update is also extremely useful for developers. This is the tool needed to find the necessary latitude and longitude values to fill in the data for a text file to be used to populate the Select Location dropdown menu.
Note: You may set the center by pressing the return key in either the Lat or Lng text box. It is not necessary to mouse over and click the Set Center button.
The Set Zoom button will directly set the zoom level to values between 0 to 20.
Note: You may set the zoom level by pressing the return key in the zoom text box. It is not necessary to mouse over and click the Set Zoom button.
Note: The maximum zoom level for terrain maps with fine contour lines is 15. As of 2018, we have decided to let terrain maps zoom to level 20. If the zoom level is higher than 15, Google will show either a blurry terrain map or temporarily revert to a roadmap.
The Mark Center button will place a marker at the current center.

Recall that the Find Location control will automatically place a marker at the location it finds.
Any marker that is placed on a map may be clicked. Upon a click, an alert box will be shown.
The Remove Markers button will remove all markers that have been placed on the maps.
The Google Maps image
 is a link that will open up
the standard Google Maps application in a separate tab.
The Google Maps application will open with a map that has the same center and zoom level as the current maps and the same map type (map, hybrid, terrain, or satellite) as the map in the top left position.
This facility is useful because the standard Google Maps application has features that have not yet been released in the developer version of Google Maps that is used here. For example, one may access traffic information and one may print road maps.
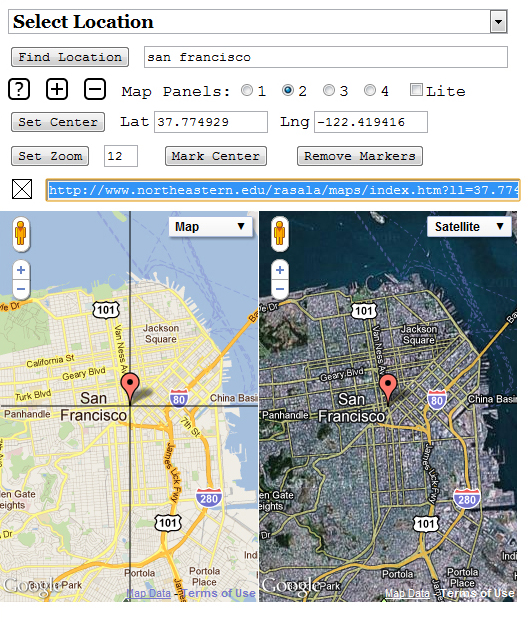
The Make Link to Current Synchronized Maps control will construct a link that will recreate the current state of the Synchronized Google Maps as far as is possible. When that control is clicked, the link is created and shown as follows:

The link is automatically selected so it may immediately be copied
to the clipboard for pasting elsewhere. For example, the link may
be pasted into an e-mail or be used by a developer as an
href on a web page. Note: To close the link text box,
click on the box

As an illustration, here is the link to the above example. This link was obtained by copying the link from the original maps page and pasting the link into the reference below:
Note that this link opens the default application with Northeastern maps made available in the dropdown menu. Despite the specific set of maps made available in the dropdown menu, you may use the Find Location text box to initiate a map search for any location on earth. In this instance, the original search was made for the location san francisco.
The Google Maps API also provides the map-type-selection control:

Using this control in a map, the user may decide which map type is shown in that map. By manipulating this control in all 4 maps, the user may override the default map arrangement described above. Furthermore, if the Make Link to Current Synchronized Maps control is then used, the created link will encapsulate this user defined arrangement of the map types.
The Map side of the control allows the user to select a regular road map or a terrain map.
The Satellite side of the control allows the user to select whether labels are shown or not. Showing labels is the default and such a map is called a hybrid satellite map.
If the zoom level is high, it may be possible to show a satellite map at a 45-degree angle. It that case, Google will provide a way to make this choice.
More information and examples related to Synchronized Google Maps